DeepSeek Harness Quickstart: From Installation to Your First Request
After DeepSeek Harness went open source, a lot of people were curious about its plugin architecture — but opened the web UI and had no idea where to start. In reality it takes just four steps: launch the tool, configure a model, add a workspace, and pick a model. All four must be done before you can send a request that actually gets a response.
Install and Launch DeepSeek Harness
The fastest path for a quick try is npx:
npx @deepseek-ai/dsh webnpx downloads and starts the published package, then prints a Web UI address — open it in your browser.
If you want to read the source, debug plugins, or modify the implementation, install from source:
git clone https://github.com/deepseek-ai/deepseek-harness.git
cd deepseek-harness
pnpm install
pnpm run build
pnpm dsh web
Both paths land on the same Web UI. Use npx for a quick体验, use pnpm dsh web for source development.
If startup throws an error, first check that your Node.js version meets the requirements (Node 22.19+ or Node 24+), and that pnpm is installed.
Configure a Model: Providers and Custom Providers
After opening the Web UI, go to Settings → Model. There are two entry points here: "Add Provider" and "Add Custom Provider".
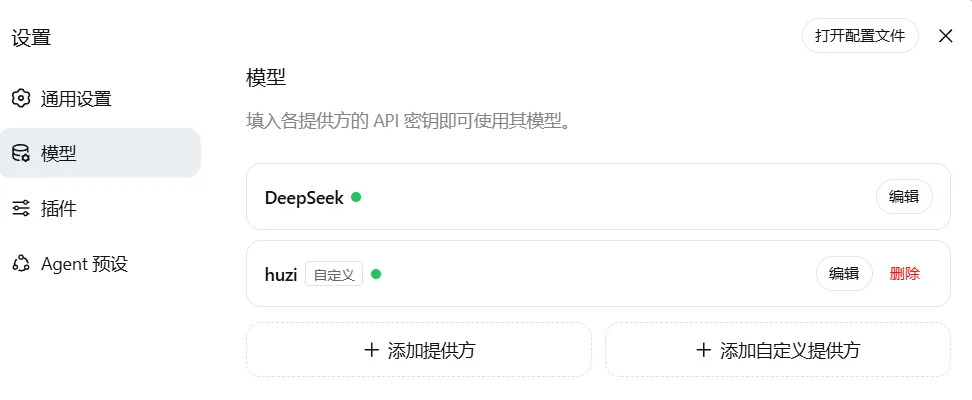
- Add Provider: use official APIs from common vendors like OpenAI, MiniMax, or GLM
- Add Custom Provider: use a proxy service or an enterprise-internal API
Fill in the configuration page and save. A green status dot means the config has been recognized. Whether it actually works needs to be verified by sending a message.
A Workspace Must Be Added
Once the model is configured, you still cannot chat immediately. DeepSeek Harness requires you to select a workspace first.
A workspace is the directory the Agent can currently see. It can be a real project or just an empty folder.
If you just want to test whether the model works, create an empty directory:
mkdir deepseek-harness-demoBack in the Web UI, click "Add Workspace" in the left sidebar, and select the folder you just created.
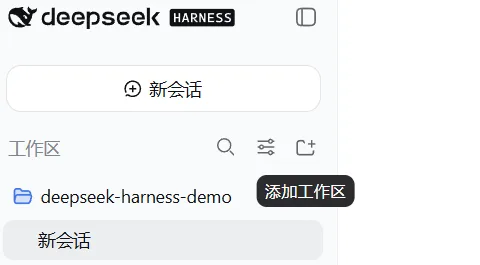
After adding it, the folder name appears in the left workspace list. Select it, then create a new session.
Using an empty folder for the first test has one benefit: there are no real project files inside, so even if you accidentally select a looser permission setting, you won't touch real code. Once you confirm the model and UI are both working, switch to a real project.
The workspace is not part of model configuration — it is a hard requirement for starting a conversation. The model decides which endpoint receives the request; the workspace decides which directory the Agent operates around. Both must be ready before the input area is fully usable.
Pick a Model and Start the First Conversation
In the new session, open the model picker in the bottom-right corner of the input box and select the model you just configured.
Four conditions are now met:
- DeepSeek Harness is running
- A model provider is configured
- A workspace has been added and selected
- The current session has a specific model selected
Now type a simple "hello" in the input box to confirm the model can return a response.
The send button lighting up only means the conditions for sending are met. A message being sent and a model response being received — that is when the first real request actually works.
For the first verification, don't rush into asking the Agent to modify files or run commands. Confirm the basic chat link works first, then gradually test file reading, writing, and permission controls. If something goes wrong, it is much easier to locate when the scope is small.
The whole getting-started flow compresses into one line:
npx or source launch → configure provider or custom provider → add workspace → select model → start chattingThe page opening only means DeepSeek Harness is running. Pick the model and workspace, receive the first reply — that is when it is truly working.