Modeling a Game Character with Codex + Blender: A Step-by-Step Walkthrough
One of the biggest beneficiaries of stronger coding models has been Blender — the open-source 3D modeling tool that just got a lot more approachable. With a strong enough model behind it, an ordinary person can produce fairly detailed 3D models with AI assistance, and there are already plenty of striking game effects out there built on exactly this combination.
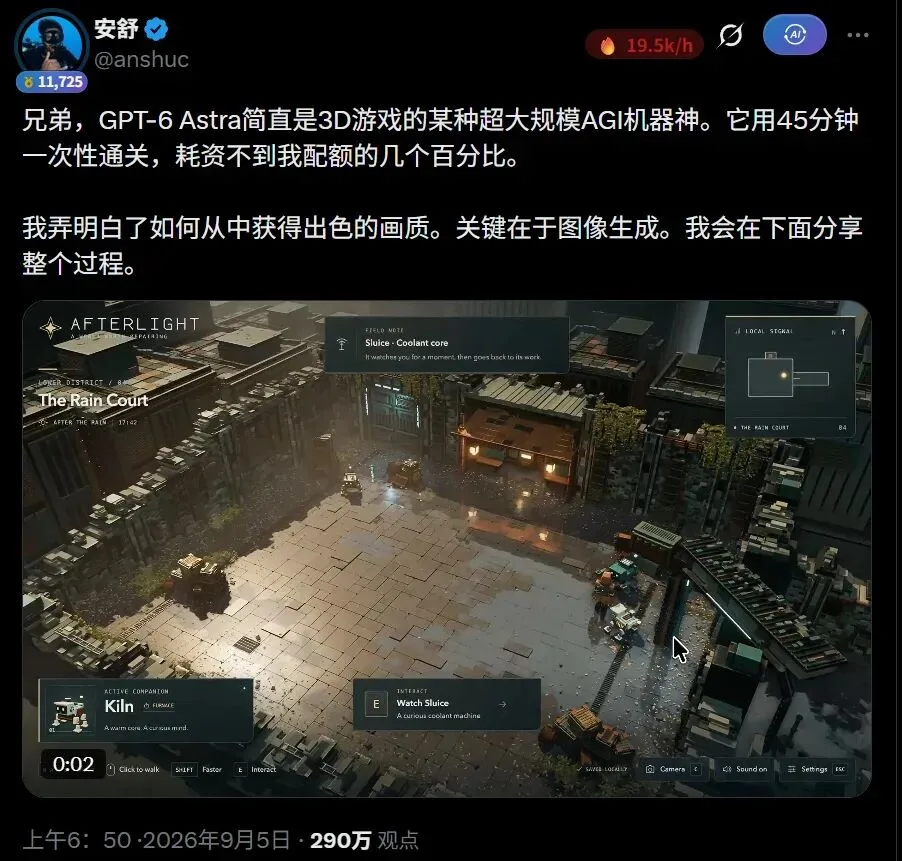
This post walks through the full process of modeling a game character with Codex + Blender — driven through the Blender MCP server — from environment setup to final acceptance.
1. Install Blender
You need Blender installed locally first. Grab the installer for your OS from the official Blender download page, install it with admin rights, and click through the defaults — nothing unusual here.
2. Install the Blender MCP Server
Blender has a matching MCP server; once it's installed, you can drive Blender directly through MCP, which works noticeably better than manual operation. Blender MCP is an open-source project at github.com/ahujasid/blender-mcp — follow the official instructions closely, since deviating tends to cause errors.
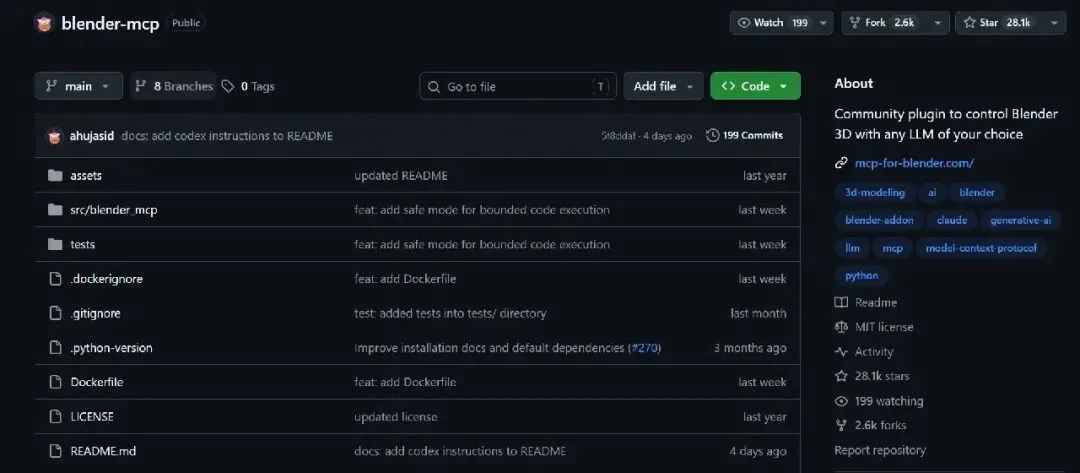
2.1 Install uv
Open a terminal and run the command for your OS:
# macOS
brew install uv

# Linux
curl -LsSf https://astral.sh/uv/install.sh | sh

# Windows
powershell -c "irm https://astral.sh/uv/install.ps1 | iex"
Windows users should use the official uv installation method rather than pip install uv — the latter can leave you with just the Python package and no uvx command.
2.2 Add the MCP Server to Your Client
For Claude Desktop, go to Settings → Developer → Edit Config and add:
{
    "mcpServers": {
        "blender": {
            "command": "uvx",
            "args": ["blender-mcp"]
        }
    }
}
For Claude Code, run:
claude mcp add blender uvx blender-mcpFor Codex, run:
codex mcp add blender -- uvx blender-mcp2.3 Install the Blender Add-on
Also in the terminal:
uvx blender-mcp install-addonAfter installing, you still need to enable it inside Blender itself: Edit → Preferences → Add-ons → enable Blender's MCP add-on, then check the box.
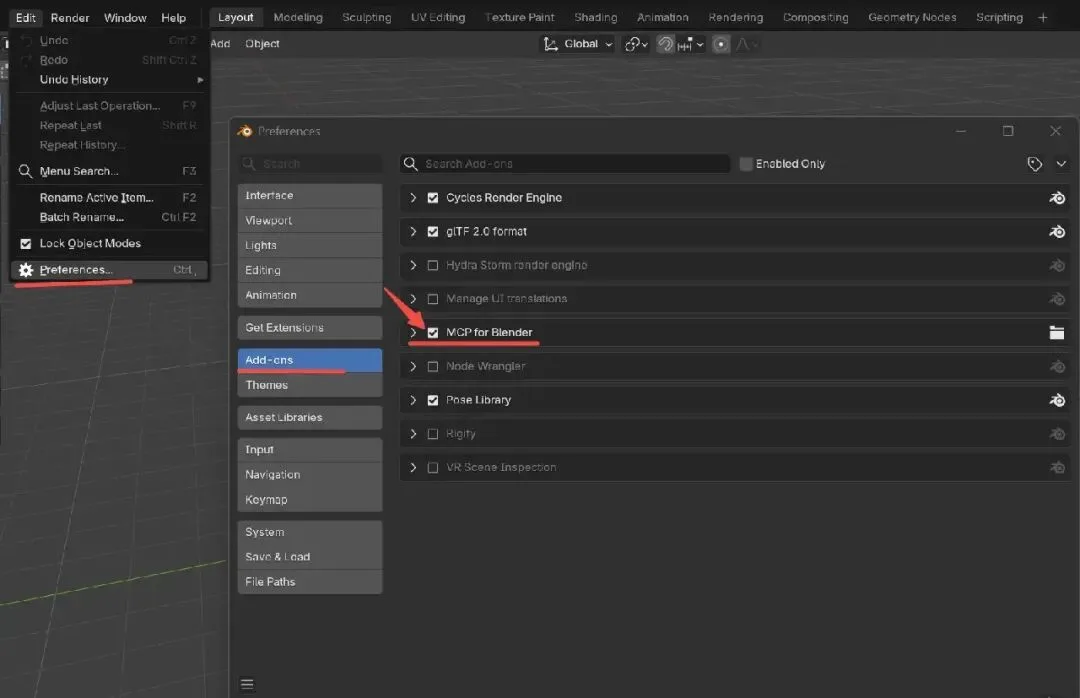
2.4 Start the Blender MCP Server
With the add-on enabled, press N inside the Blender viewport — a Blender MCP panel appears on the right side. Open it and connect.
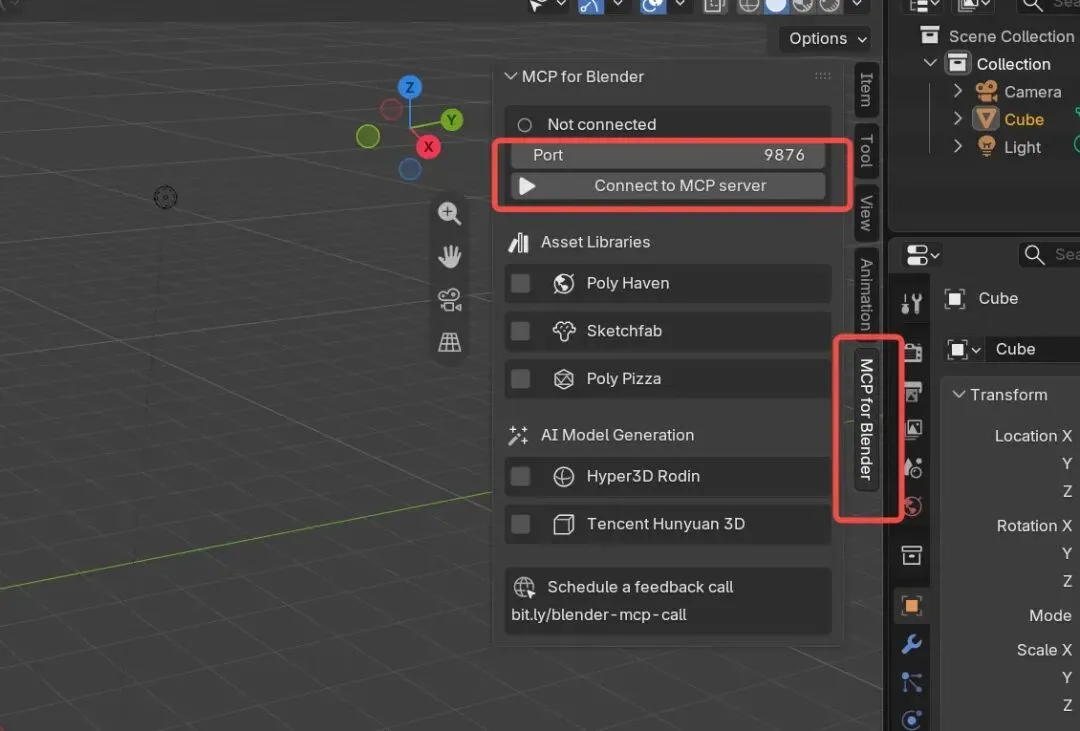
2.5 Common Issues
- If Codex reports that
uvxcan't be found, runwhere uvxin the terminal and paste the full path it returns into Codex's MCP config. - If the tab doesn't show up in Blender's side panel, rerun the install command, then disable and re-enable the add-on — or just restart Blender.
- Beginners can add
BLENDER_MCP_SAFE_MODE=1to the service config in Codex. Safe mode blocks high-risk operations like reading arbitrary files, launching other programs, or network access, while normal modeling, materials, rendering, saving, and export still work. - Restart both Codex and Blender after configuring. If it still won't connect after clicking start, check whether port 9876 is already taken by another Blender instance or another MCP client.
- Don't let multiple clients control the same add-on instance at once.
3. Break the Character Into a Verifiable Feature Checklist
When modeling, don't just say "model it based on this reference image." Save the reference image as its own file first, then list out the features that must be preserved.
For a hero character from a tower-defense game, the checklist looked like: young swordsman, slightly chibi proportions, a high ponytail, dark teal armor, off-white sleeves, a short vermilion waist sash, dark trousers, brown boots, a short curved saber. The goal is a stylized low-poly model — no realistic skin shading, and no attempt to rig it for animation from the start.
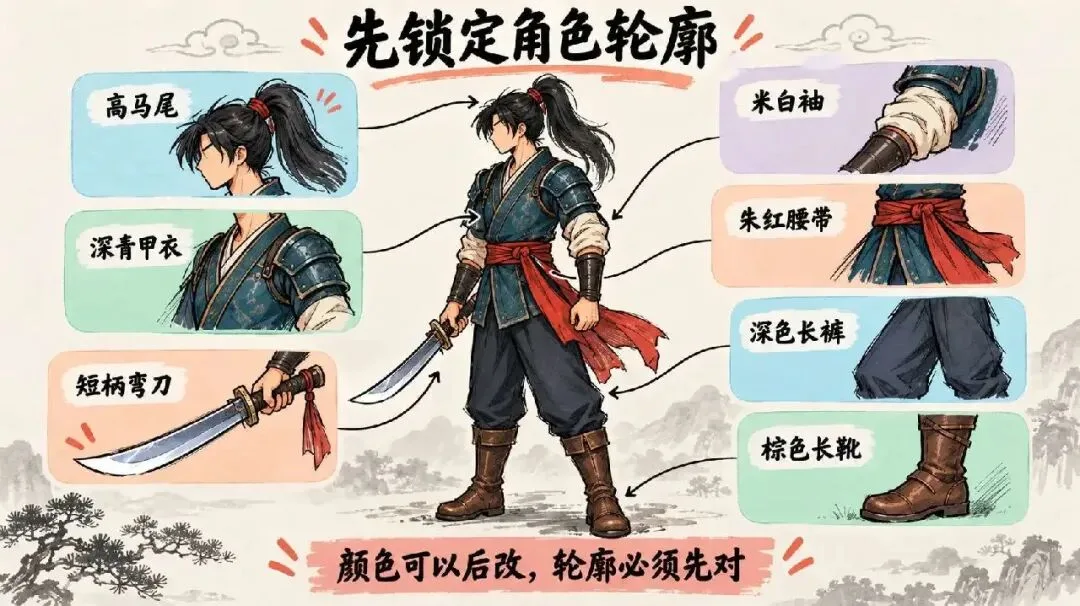
Send the following as the first request to Codex, swapping in your own reference image path:
In a new Blender scene, model a patrol-guard hero character based on the reference image.
Style: Eastern fantasy, stylized low-poly, overall height 1.8 meters.
Must preserve: high ponytail, dark teal armor, off-white sleeves, vermilion waist sash, dark trousers, brown boots, short curved saber.
Structure: name body, clothing, hair, and weapon as separate objects for easy further editing.
This pass is grey-model and standing pose only — no materials. When done, return a full-body screenshot, object count, and model height.
The most important thing at this stage isn't detail — it's the overall silhouette. Whether the character stands stably, whether limb proportions look right, whether the saber's length feels appropriate — all of that should be resolved at the grey-model stage. You don't need to worry about exactly how Codex is calling Blender's API to get there; you just need to check whether the output model actually resembles the reference character.
4. Acceptance: Don't Just Look at the Render
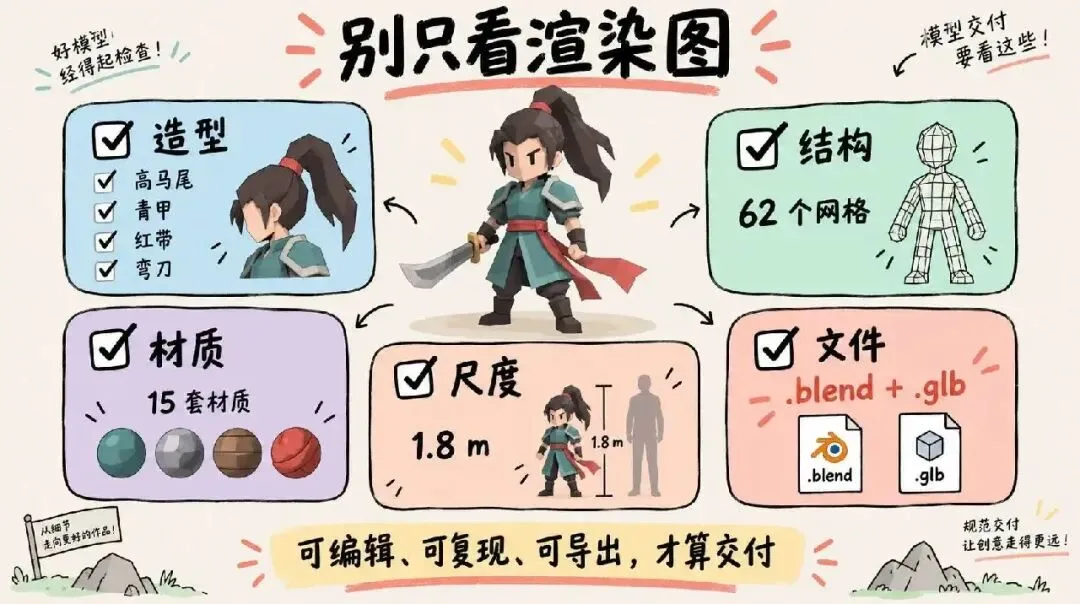
A finished model might come out to 62 meshes, 2,804 vertices, 2,740 polygons, and 15 material sets — but those numbers alone aren't enough. Before calling it done, check each of these:
- From the front, can you clearly recognize the high ponytail, teal armor, red sash, and saber?
- From the side, do the hair, saber, and arms clip through each other?
- In the Outliner, are body, clothing, and weapon grouped clearly?
- Are units set to metric, and is the character actually 1.8 meters tall?
- Can the
.blendfile be closed and reopened without issue? - After re-importing the
.glbinto an empty scene, are materials and proportions still correct?
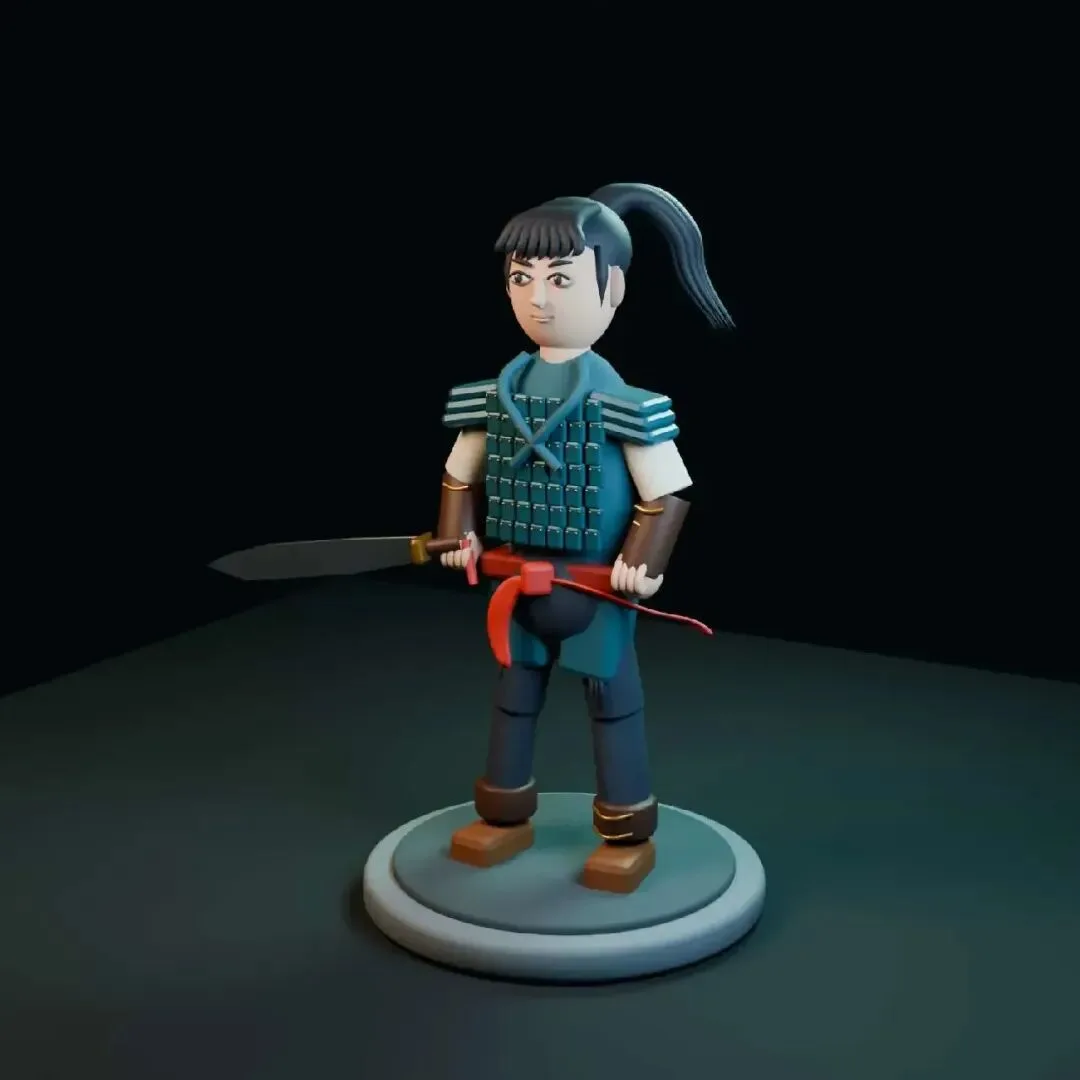
The finished result still looks a bit rough — the face has more polygons than it probably needs — mostly because model quality was limited by the compute budget available at the time, not enough to push for higher fidelity. But it's enough to demonstrate that Codex + Blender is a workable combination, and one that stands to meaningfully lower the barrier for game development specifically — you don't need to learn every detail of a modeling tool from scratch to take a character from a reference image to an editable, exportable 3D model, as long as the requirements and acceptance criteria are spelled out clearly.